Tag Archives: easy

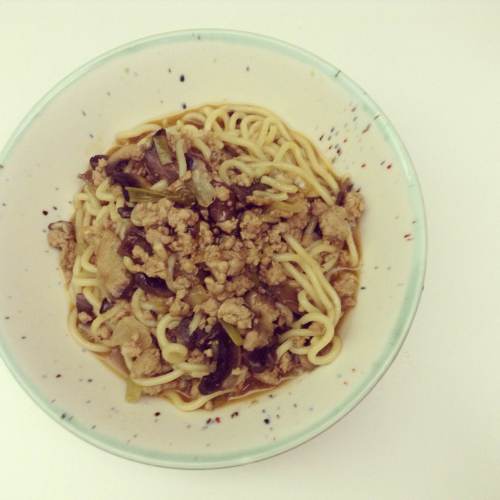
Stir fried spicy noodles with pork and mushrooms

Pasta is a great and easy option for weeknight dinners but that doesn’t mean it is always the best option. It’s easy to make a bit too much and it’s also very tempting to put creamy sauces or heaps of cheese on. So if you’re looking for a weeknight meal that’s easy, cheap and healthy it’s great to have some hokkien noodles in the cupboard. They’re super easy when you want a quick dinner- you don’t even have to cook them and they’re pre-packaged so you can keep track of portions and nutrition info. This is one of my favourite stir fry dishes to make with the noodles. It’s pretty versatile and you can use pork or turkey mince- whatever you have on hand. When you’re cooking the meat with the mushrooms and sauce it will seem like there is a bit too much liquid but once you simmer for a couple minutes and add the hokkien noodles they will soak up the sauce. Hokkien noodles are available at most grocery stores and at Costco you can often get a big box for just a couple dollars.

IMG_6203

Adapted from this recipe
Serves 4

2 tablespoons dark sesame oil, divided
4 servings of hokkien noodles
1 bunch green onions, trimmed and cut into 1-inch pieces
12 ounces lean ground pork
8 oz. sliced mushrooms
1/2 cup chopped onion
1/4 teaspoon kosher salt
3 large garlic cloves, minced
2 teaspoons cornstarch
2 cups chicken stock
3 tablespoons lower-sodium soy sauce
1 tablespoon sriracha
4 lime wedges

Heat a wok or large skillet over medium-high heat. Add 1 tablespoon oil to pan; swirl to coat.

Add pork to pan; sauté for 2 minutes, stirring to crumble. Add mushrooms and saute 2 more min or until brown. Add the green onions.

Stir in chopped onion, and salt; sauté 3 minutes, stirring occasionally. Add garlic; sauté 30 seconds, stirring constantly. Stir in cornstarch. Gradually add stock; bring to a boil. Stir in soy sauce and sriracha; cook for 1 minute, stirring frequently. Add the hokkien noodles and stir to combine. (Some hokkien noodles will need to be softened in boiling water- check the instructions on the package). Divide the noodles and and pork mixture among four shallow bowls. Serve with lime wedges.

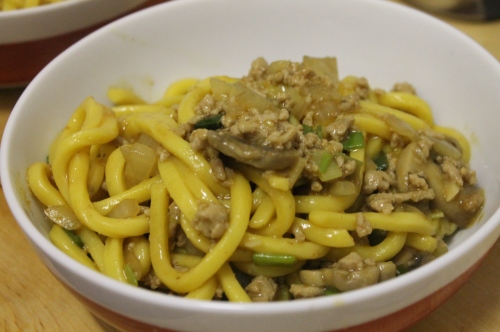
photo (10)

3 Comments

Filed under Dinner, Recipe

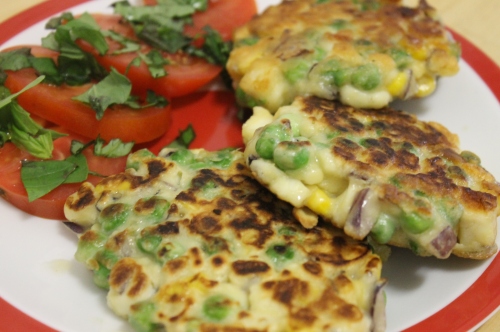
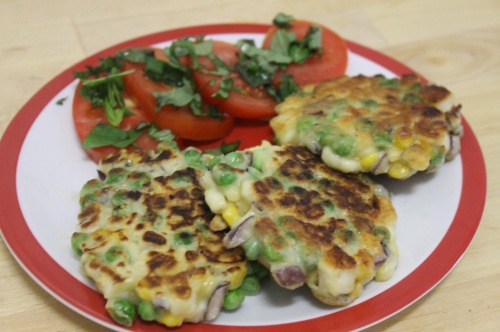
Pea and haloumi fritters with tomato salsa

IMG_5510

This is a great meal for lunch or dinner. I made it for lunch one day when I was running low on cash to go grocery shopping and decided to just make something with whatever I could find in the fridge. Luckily I had some frozen peas, a bit of haloumi, some red onion, plus eggs and flour. I’ve done variations of these fritters since- one with zucchini, corn and haloumi which has actually turned Ciaran on to eating haloumi. I never thought I’d see that day. All you really need for these fritters is some eggs and flour to make the base and then your choice of veggies. The haloumi is also essential because other cheeses will melt too much and you’ll have a puddly mess of dairy and veg. If you’re using veggies that you have to chop yourself, basically anything other than peas and corn, make sure you cut the pieces very very small or your fritters will be very ugly and fiddily.

Recipe from Vegie Project

  • Prep time: 10 min
  • Cooking time: 10 min
  • Servings: makes 12
  • Difficulty: easy

Ingredients:
1 cup frozen peas
1/4 red onion finely diced
30g haloumi cheese finely diced
2 eggs
1/2 cup self-raising flour
salt and pepper to taste
olive oil to shallow fry

Tomato salsa:
2 tomatoes finely chopped
2 tablespoons chopped coriander
1/4 red onion finely diced
juice of half a lime
salt and pepper to taste
a pinch of chilli flakes

IMG_5509

To prepare the tomato salsa just combine all the ingredients in a bowl and season with salt and pepper to taste. Set aside.

Place the frozen peas in a small saucepan with water and boil them for 2 minutes. Drain and set aside.

To make the fritters simply combine all ingredients in a bowl.

Heat 2 tablespoons of olive oil in a non-stick frying pan. Drop tablespoons of the fritter mixture into the pan (about 2 tablespoons will make one fritter). Flatten the fritters slightly with a spatula. Cook the bottom side for about 3 minutes until a crust forms, then using a spatula flip the fritters over and cook for another 3 minutes.

Serve with the tomato salsa.

-A

Leave a comment

Filed under Dinner, Lunch, Recipe

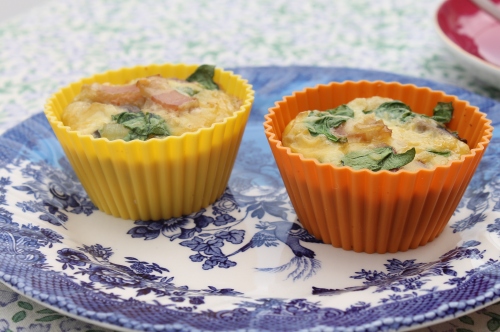
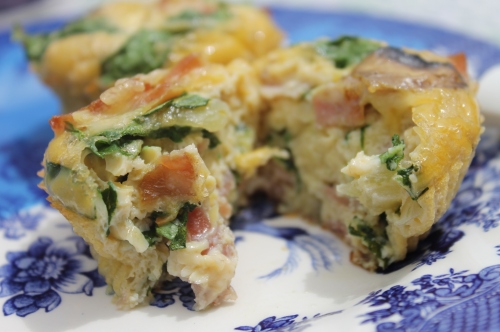
Scrambled egg muffins

IMG_2542

Some people are morning people. I am not one of them.

My morning routine takes about an hour and if it starts before 10am, I’m usually not in a good mood during it. And that long routine doesn’t even include making breakfast.

Another one of my resolutions is to start eating breakfast. I’m one of those people who will just grab the $5 coffee and croissant deal from the cafe downstairs while running to work, one of those people who eats some Cheez-its out of the box for breakfast because pouring cereal and milk is way too much work, one of those people that thinks cold pizza in the morning can most times be better than hot pizza (but not in Australia, sorry guys but pizza here kind of sucks), one of those people who constantly seems to have expired milk in the fridge…you get what I mean.

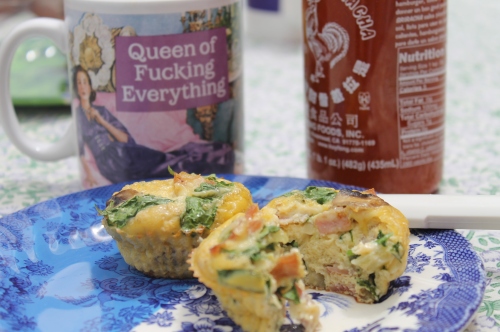
So breakfast is always a struggle. Though I still think Cheez-its or Goldfish make a great breakfast. Alas, I have tried to stop eating cheese flavoured crackers for brekkie and make sure I eat a suitable breakfast food at a suitable breakfast hour instead. And since I’m constantly running out the door in the morning, I wanted something I could make in advance and eat for a few days. Enter the scrambled egg muffin, a genius of good ingredients, portable size and awesome-ness! I realize making scrambled eggs takes all of fifteen minutes but then you have to wash and sit down and use a fork and it’s all just a massive process in my world. So I decided to take all of that and put it in the shape of a muffin and make lots so I could eat them ALL WEEK. Genius? Why, yes I think so.

IMG_2550

Scrambled egg muffins
Makes 10
6 eggs
1/2 onion, diced
2 pieces streaky bacon, diced
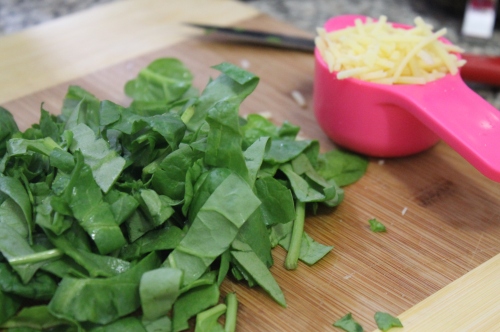
1 cup spinach, chopped
1 cup mushrooms, chopped
1/2 cup reduced-fat tasty cheese
Salt, pepper and olive oil

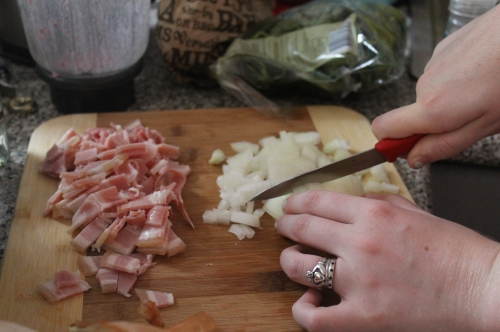
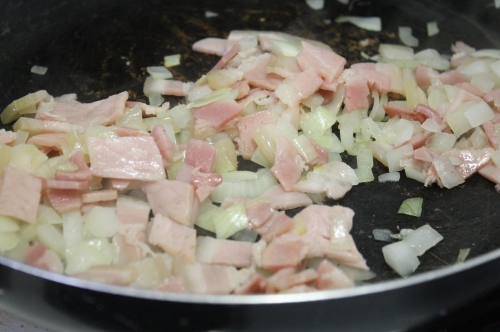
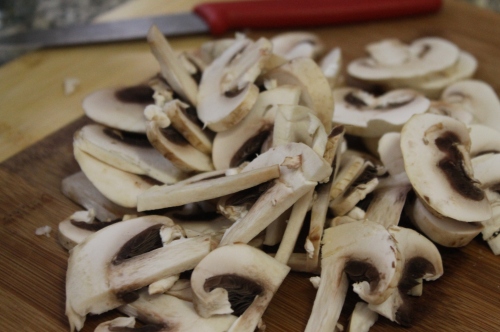
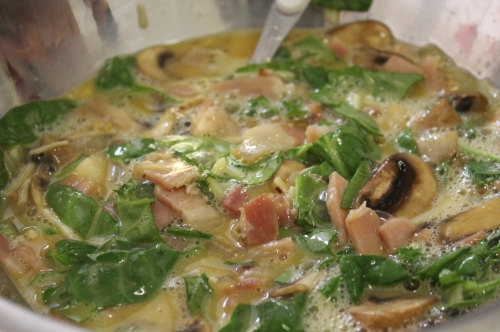
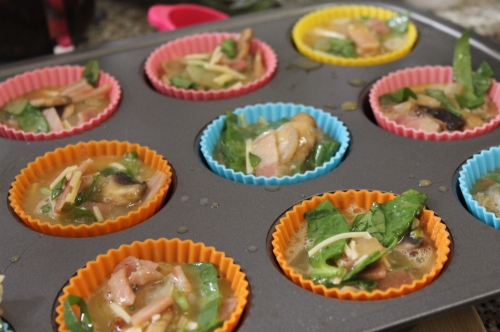
Preheat your oven to about 170C. Chop the onion, bacon, spinach and mushrooms to have them ready. Saute the bacon and onion in a frying pan with a teaspoon of oil on medium high heat. After two minutes add the mushrooms. Saute until the bacon is a bit crispy and the onion and mushrooms are soft. Turn off the heat and let it sit for a few minutes so it doesn’t cook the egg right away. In a big bowl scramble the eggs together. Throw in the onion, bacon, spinach, mushrooms and cheese. In a muffin tin coated with cooking spray or with little muffin cups (like the ones in the picture). Spoon the mixture evenly between the muffin cups. Put them in the oven for about 25 minutes or until a toothpick inserted in the centre of a muffin comes out clean. Enjoy!

These are quite small so I usually had two per morning but I think Ciaran could have had three per morning so it’s up to you. This is adapted from a recipe where the muffins were 133 calories each and this version just has more vegetables so the calorie count shouldn’t be too far off that.

IMG_2533

IMG_2536

IMG_2537

IMG_2538

IMG_2539

IMG_2540

IMG_2551

And that’s how I enjoy my morning.

Enjoy!

Allie

2 Comments

Filed under Breakfast, Lunch, Recipe

Chicken wraps

Finding yourself stuck when trying to create simple and healthy lunches? One of the easiest things to have in your fridge for these occasions is a rotisserie chicken. Otherwise known as those already cooked big chicken things that come in a hot bag at your grocery store. They’re often found next to the deli in a small heated section. In Sydney, a whole chicken is about $10 so if you buy one at the beginning of the week, shred it up and store it in your fridge in some tupperware, you should get about 6-8 meals out of it depending on how you use it. To shred it simply peel off the skin, or keep it but if we’re going for healthy I recommend ignoring that part, and pick off the white meat in small pieces with your hands. It may take a little while, probably about fifteen minutes, but it will save you time during the week. And as an fyi, the chicken may start to smell a little different after sitting in the fridge than that beautiful roast chicken you brought home. Like a little similar to if your two brothers just ate a bunch of tacos and then got into the car with you and locked all the windows. But it still tastes good! I promise. It will last you about four days. After that the smell may be indicating its need to exit your fridge via the bin. Despite that slightly unappetizing sidenote, you can use rotisserie chicken in sandwiches, wraps, salads, pastas and more. It’s very versatile.

Chicken wrap
Serves 1

1 Spinach tortilla
1/2 cup rotisserie chicken, shredded
1/2 cup baby Cos lettuce, chopped
1/4 cup reduced-fat tasty cheese
2 tablespoons salsa

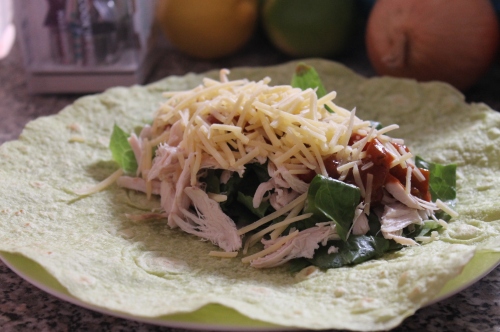
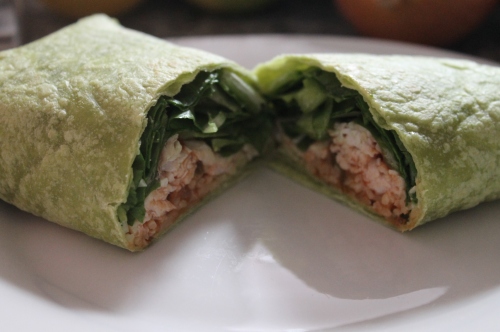
Combine all ingredients in the wrap. Then wrap it up. And eat it.

IMG_2498


IMG_2499


Enjoy!

Allie

Leave a comment

Filed under Lunch, Recipe

Chorizo, haloumi and zucchini skewers

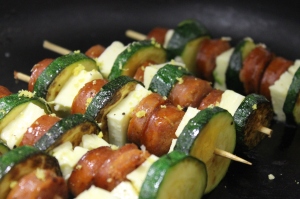
I’m still not really sure how I got away with making this for dinner last night. Basically it is just a combination of all my favourite foods (that I’m still eating at the moment, due to New Year’s resolutions and all that nonsense…) put onto a stick. But Ciaran still went along with it and enjoyed it.

You know why? Because putting food on a stick always makes it awesomer. The only thing I can currently think of that wouldn’t work is cottage cheese. Not sure why that particular ingredient popped into my head, but it was the first thing that I couldn’t imagine eating on a stick.

Take, for example, the gallery I did for my internship at Yahoo!7 Lifestyle ‘Stuck on Stick Foods‘. Within the digital pages of this masterpiece you shall find foodie treasures such as…..(drumroll)

French toast on a stick

Cinnamon buns on a stick

Chocolate moustaches on a stick

Brie and jam tarts on sticks

Mini grilled cheese on a stick

Even pancakes and sausage on a stick

When you think about it, doesn’t corn get better on a stick, doesn’t cotton candy get less sticky and all over your face on a stick (well for most people) and don’t you just sometimes wish you could have your very own giant meatball on a stick? (Yeah, that’s in the gallery as well).

Some of my least favourites would have to be the fried milk on a stick…or possibly even the cake pops but that’s just because I haven’t mastered making those yet. They now sit among my foodie foes, along with omelettes and custard.

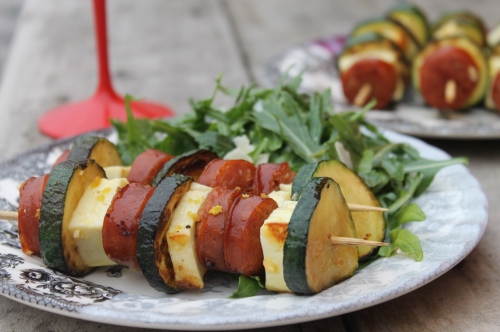
The moral of the stick story however, is that you should take your favourite vegetables and cheeses and meats and combine them in a lovely stick party on your plate. I served this with a side of arugula dressed in just a touch of olive oil, a squeeze of lemon juice, a sprinkle of salt and pepper and a bit of shaved parmesan but that last ingredient was purely for flair.

IMG_2491

Chorizo, haloumi and zucchini skewers
Serves 2
2 chorizo sausages, sliced
1 lemon, for juice and rind
180g haloumi cheese, cubed
1 medium size zucchini, sliced
1 garlic clove, finely chopped
1 tablespoon olive oil
To serve: 2 cups arugula, squeeze of lemon juice, dash of salt and pepper and sprinkle of parmesan

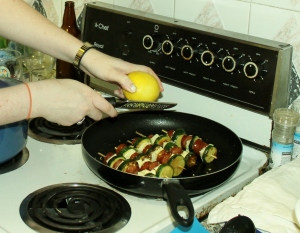
This recipe can be done either on the barbecue or in a pan over medium heat. Cook the chorizo for 1 minute on each side, remove and set aside. Cook the zucchini for 2 minutes on each side, remove and set aside. Thread the chorizo, haloumi and zucchini onto 6 medium or 4 large skewers. Put them into the pan and drizzle with a bit of olive oil, the garlic and then hold the lemon over the pan and grate a bit of lemon zest over the top of the skewers.

IMG_2477

Hold the lemon over the pan and gently strip off some of the lemon zest with a small cheese or spice grater.

Cook the skewers until the ingredients are golden.

Cook the skewers until the ingredients are golden.

Cook skewers, turning occasionally for 4 to 5 minutes or until the chorizo and haloumi are brown and heated through. Serve with arugula salad.


IMG_2497

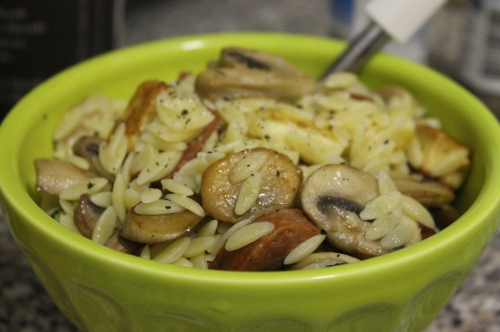
And if you have leftovers, like I did, simply add some sauteed mushrooms and orzo for a second weeknight meal.

Enjoy!

-A

1 Comment

Filed under Dinner, Recipe

Haloumi with mushrooms and asparagus

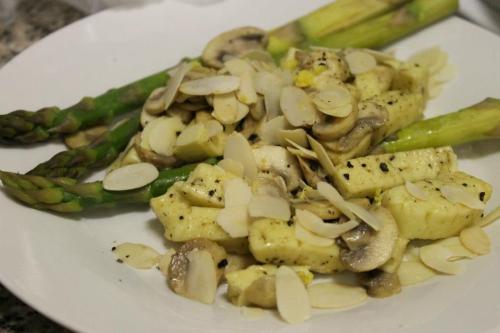
For a while I really wasn’t sure what the fuss was over haloumi. Honestly I hadn’t even heard about it much before coming to Sydney. Over here though you can find it everywhere. I guess it has taken over the place of feta or goat’s cheese in salads across the city. To be honest, I just kept seeing the name everywhere and for ages I thought it was a type of mushroom…not a type of cheese. But turns out, it is a cheese and it is darn tasty. So I decided to cook some for myself. This recipe is probably best done on the grill, haloumi has a very high melting point which makes it ideal for grilling or frying, but I don’t own a grill so I pan-fried this salty little treat. I simply seasoned it with some lemon juice, salt and pepper and paired it with some steamed asparagus and sauteed mushrooms. Simple, easy, done. And it’s under 500 calories.

Enjoy!

Haloumi with mushrooms and asparagus
Serves 4

Ingredients:
3 tbs olive oil
1 tbs lemon juice
Cracked black pepper
400g button mushrooms, quartered
250g haloumi, sliced
18 asparagus spears
1/2 tsp lemon zest
1/4 cup slivered almonds, toasted

Method

1. Preheat grill pan or barbecue.
2. Combine oil, lemon juice and pepper in a small bowl. Toss through mushrooms and haloumi.
3. Place mushrooms and haloumi on grill pan or barbecue and cook, 5 to 7 minutes, turning regularly to prevent haloumi from burning.
4. Steam asparagus, 2 to 3 minutes.
5. Arrange mushrooms, haloumi and asparagus on serving plate and scatter on lemon zest and almonds.

45159_3109896301409_711383012_nEnjoy,

A


3 Comments

Filed under Dinner, Lunch, Recipe

Guest Post – Super Easy Breakfast Tarts

Living with two girls who turn out to be fantastic cooks has its apparent advantages. I can no longer count on two hands how many times I’ve wandered into the girls’ apartment to smell something amazing being baked/cooked/fried/prepared, roughly ten seconds before platters of food get shoved in my face accompanied with inquisitive stares that scream “what do you think? (and don’t you dare say anything bad about it!)”. Despite this pressure, these girls know how to cook and I can’t remember ever having anything bad to say about any of their creations. There’s definitely nothing more amazing than coming home after an epic night bartending and seeing an aluminium (sorry Allie, ‘aluminum’) foil-wrapped plate full of goodies waiting to be heated up and consumed at record pace. So I can’t really have anything to complain about right?

Unfortunately, skilled as Allie and Kahina are, there is one hugely embarrassing downside. Any time I attempt to create something of my own, it’s inevitably followed by ‘so-you’re-really-going-to-try-putting-those-ingredients-together’ stares, and two pairs of waiting eyes watching to see what my next culinary disaster will yield.

Take for example the last time Kahina made crepes. She is a genuine whizz when it comes to these things, I’m pretty sure making crepes is as inherent to French DNA as making pastries or appreciating fine wine. Anyway, Kahina was making us all breakfast and I, attempting to get in the spirit of things said “why don’t I try making my own?”. Cue raised eyebrows. Five minutes later what can only be described as a crepe batter explosion is all over the pan and surrounding benches and Kahina and Allie in stitches as I try to repair the damage to my breakfast. Crepes 1, Ciaran 0.

So my latest experiment was also something of a disaster. Both the girls were out and I figured I’d try to quickly cook up something before running off to Uni. We had a fair amount of puff pastry and some eggs left in the fridge from a previous cooking adventure, and having seen something about baked eggs in puff pastry on Masterchef, I thought I’d give it a go. What could possibly go wrong? Allie came home as I was finishing removing them from the oven and immediately I got the “omg-what-were-you-thinking-it’s-just-eggs-and-pastry” looks. Needless to say it was extremely embarrassing and yielded weeks of “Ciaran and his egg tarts” jokes. But this time I was intent on proving I could do something with the idea, and came up with these awesome breakfast tarts. I’ve seen variations of them at cafés all over the place and they’re just so easy that anybody can whip them up in a matter of minutes to impress even the most intense and critical foodie. Enjoy!

Ciaran

Ingredients – Makes 4 medium sized Breakfast Tarts

2 Sheets Puff Pastry

6 Eggs

2 Rashers Middle Bacon

1 Tomato (Alternately you can use Cherry Tomatoes)

100gms Button Mushrooms

Rocket to Garnish

Salt

Pepper

Butter

Sauce of your choice

Method:

Try to use a muffin tin or something similar. Fortunately I managed to use the girls pie tins which turned out to be perfectly sized for these tarts. Take the puff pastry out of the freezer and leave to defrost. Fry the bacon until crispy and then leave it on the side. Slice the mushrooms thinly, cook in a pot until soft and then set aside in the pot. Grease the muffin/pie tin with butter and then arrange the puff pastry so that you make a small bowl in the tin to hold the eggs. Add one full egg and then more egg white if required to fill the pastry bowl you’ve made. This can vary depending on the size of the bowl but be mindful the pastry and the egg will rise so try not to overdo it. The bacon can be cut up a number of ways, I tried to break it into pieces so it was all through the tart but I’ve seen it done as a long single piece so its really up to you! Toss a few of the mushrooms into each of the tarts. Dice the tomato and throw a few pieces in as well. Pre-heat the oven to 180 degrees. Bake the tarts at 180 degrees for about 15-20mins and take care not to overcook them as they’ll dry through the centre. The yolk should be just turning that lighter yellow when you take them out to rest for 5 minutes. Overturn the tins and gently remove the tarts. They may take some encouragement so I found it easier to run a knife around the edge first to make sure you get them out cleanly. Serve each tart with a little Rocket on top to give them a little extra colour and flavour. Add salt, pepper and sauce to taste.

Leave a comment

Filed under Breakfast, Lunch, Recipe